
 Search


Free software that allows you to record your computer screen is available for Windows, Ubuntu and Mac systems. You can use BB FlashBack Express 5 for Windows systems, Kazam for Ubuntu systems and QuickTime Player for Mac systems. Each of these programs has similar recording options, such as whether to record the whole screen or a specified area and whether or not to include sound from the computer or a microphone.
Step 1:
Open BB FlashBack Express 5 and click "Record Your Screen" to get started.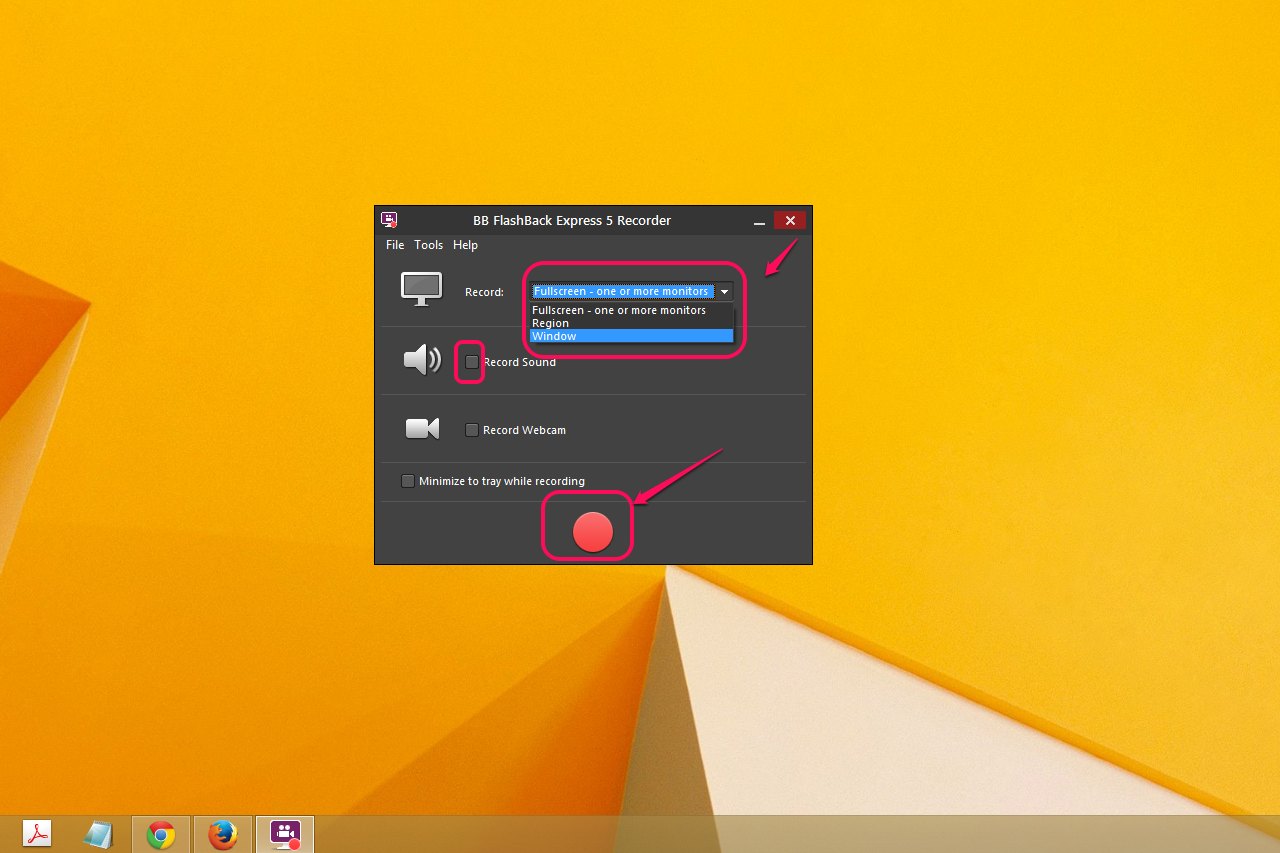
Step 2:
Click the "Record:" drop-down menu and choose what you want to record. Choose "Fullscreen" to record everything from one or more entire monitors. Choose "Region" to record a specific area you specify. Choose "Window" to record the contents of an open window. Check the "Record Sound" check box if you want to record sound from the software or your voice from a microphone. You can also record from a webcam and choose to minimize the recording software while it records. When you are finished setting up the recording environment, click the "Record" button.

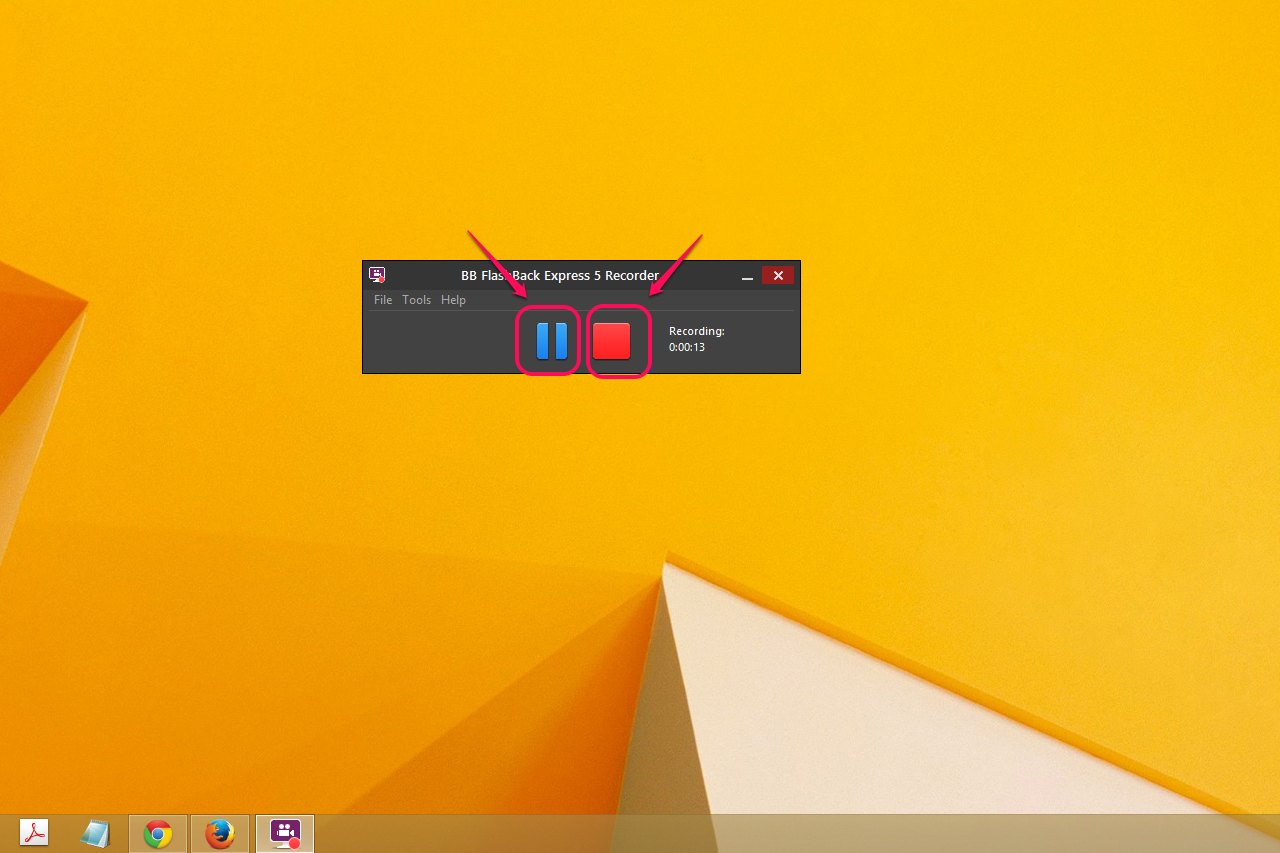
Step 3:
Click the "Pause" button to pause the recording software if you need to take a break, and click the "Stop" button when you have finished recording.
Step 4:
Select "Save" to save the recording you made. If you aren't satisfied and want to try again, click "Discard."

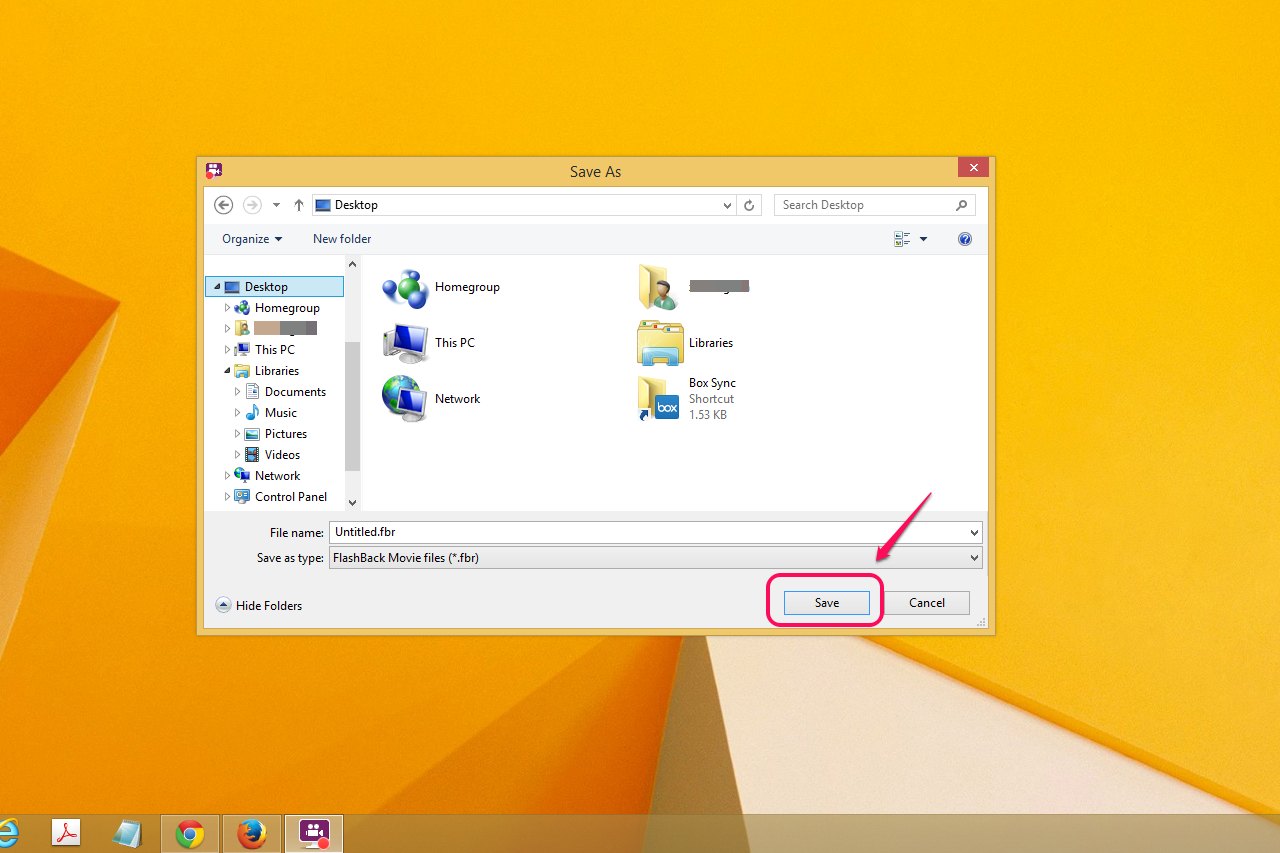
Step 5:
Navigate to where you want to store the file, name it and click "Save."
Step 1:
Open BB FlashBack Express 5 and click "Record Your Screen" to get started.
Step 2:
Click the "Record:" drop-down menu and choose what you want to record. Choose "Fullscreen" to record everything from one or more entire monitors. Choose "Region" to record a specific area you specify. Choose "Window" to record the contents of an open window. Check the "Record Sound" check box if you want to record sound from the software or your voice from a microphone. You can also record from a webcam and choose to minimize the recording software while it records. When you are finished setting up the recording environment, click the "Record" button.
Step 3:
Click the "Pause" button to pause the recording software if you need to take a break, and click the "Stop" button when you have finished recording.
Step 4:
Select "Save" to save the recording you made. If you aren't satisfied and want to try again, click "Discard."
Step 5:
Navigate to where you want to store the file, name it and click "Save."